

-
Shop
-
Learn to make
-
Start Tufting
-
About
- Tuft in Residence
- Custom rugs
-
Pile height adjustment controls how far the needle protrudes through the cloth, which determines how tall your pile will be. It is frequently requested and is often involved in other issues such as the needle not appearing to work.
| Symptom | Likely Cause | Fix / Action |
|---|---|---|
| Pile too short / not forming properly | Needle not protruding far enough; pile height too low | Adjust pile height gear upward toward position 14. Reference pile height video. |
| Pile too tall / floppy | Needle protruding too far; pile height too high | Adjust gear downward. Verify backing cloth is tightly stretched. |
| Adjusted pile height but machine behavior unchanged | Bar moved to the other side of the gear (odd vs. even) from the side the machine shipped on | Stay on the side your machine shipped on: even (8–16mm) if it shipped at 14mm, odd (9–15mm) if it shipped at 15mm. |
| Loose back rows on low-pile Duo | Low pile settings stress the backing; cloth not tight enough | Ensure backing is stretched very tight. Review manual section on pile height. |
| Pile height pin/bolt came out of position | Vibration during use; not fully secured after last adjustment | Re-seat bolt in correct hole. Reference 'Duo Pile Height' video. |
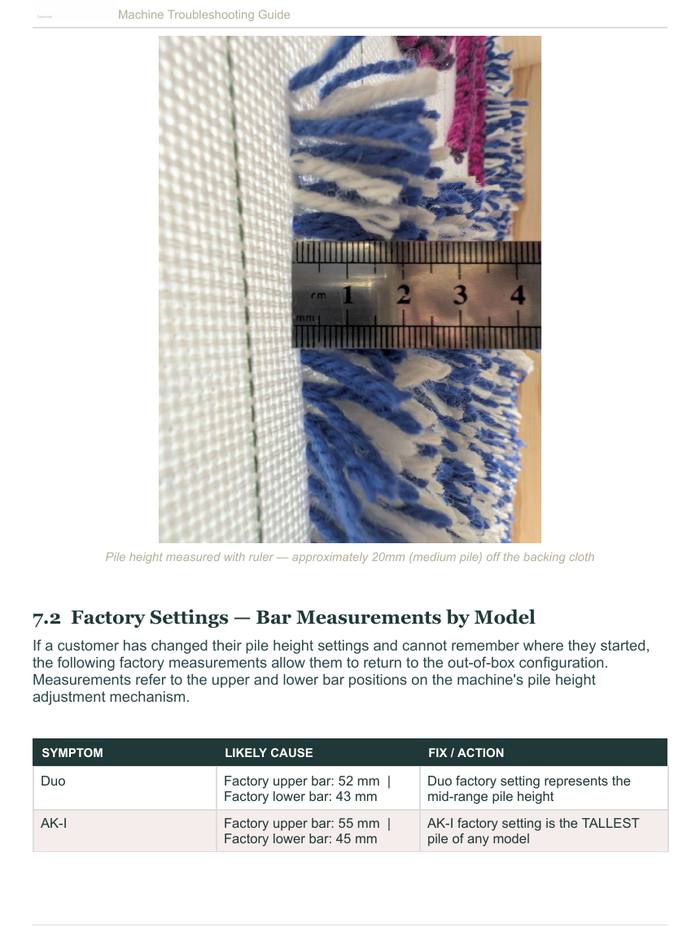
If you have changed your pile height settings and cannot remember where you started, these factory measurements allow you to return to the out-of-box configuration. Measurements refer to the upper and lower bar positions on the pile height adjustment mechanism.
| Machine | Factory Upper Bar | Factory Lower Bar | Notes |
|---|---|---|---|
| DUO | 52 mm | 43 mm | Represents the mid-range pile height |
| AK-I | 55 mm | 45 mm | Tallest factory pile of any model |
| AK-II | 54 mm | 53 mm | Shortest factory pile of any model |
Before changing pile height, swapping scissors, or making any other adjustment, take lots of photos and measurements of your machine as it is. We also recommend filming yourself as you make the changes. Incorrect changes can stop the machine from tufting correctly, and this record lets you return it to its original setting.
DUO machines come in different versions (for example, the Medium pile version), and adjustment steps differ by version. Use the video for your specific version in the showcase shared with your purchase, and contact support with your order number or email if you're unsure which version you have. If you'd rather not make the change yourself, we can do it for you, or help over a video call.
Which side of the gear you use depends on how your machine shipped. New DUO machines, and all new low-pile models, ship set to 14mm, which sits on the positive (even-numbered) side of the gear. On these machines, stay on that side when you change pile height: 8mm, 10mm, 12mm, 14mm and 16mm. If your machine shipped set to 15mm (the odd-numbered side), stay on the odd side instead: 9mm, 11mm, 13mm and 15mm.
Some older quick-start and pile height videos show the change being made on the odd-numbered side. Apart from which side of the gear you use, the adjustment is exactly the same, so follow the video using the positions for your machine. Moving the pivot point over to the other side is possible but much more challenging, and it isn't necessary. The machine works across its full range of pile heights, including the lowest setting (8mm).
You'll find the DUO pile height video, plus the threading and cut/loop switching videos, in our DUO Vimeo showcase. The link and User Manual are emailed to whoever placed the order, and the User Manual also covers pile height. If you received your DUO as a gift, or it arrived without a manual, email support@tufttheworld.com with your machine model and we'll send you the manual and video links.
The nuts on the top bar of your machine should never need to be adjusted. Don't use pliers on them, because that chews up the nuts and can strip threads. Make pile height changes with the slider mechanism only, following the video guides shared with your machine. If you're unsure, contact support@tufttheworld.com before you adjust anything. Replacement slider parts are available, and they come in several sizes, so tell us your machine model when you order one.
The DUO comes in low, medium, and high pile versions. To identify yours:
Not sure? Email a photo of your machine to support@tufttheworld.com and we'll identify it for you.
If your machine keeps running after you release the trigger, or starts firing by itself, the grounding bars on the sides of the machine have most likely slid out of position. The grounding bars tell the machine when to stop and return to its home position.
If the machine still fires on its own after several adjustments, contact support@tufttheworld.com. We can have you send the machine in and set the grounding bars for you.
One of the most exciting things about tufting is that texture is a design element — not just a material property. Here's how to use it intentionally.
Getting your design from paper (or screen) onto your tufting cloth is one of the first steps in every project — and there are a few approaches depending on…
If you teach workshops or run a studio, we offer 25% off bulk supplies. The discount can be combined with current sale prices on machines.